
6 Handy Floor Screeding Tips
Most typically used as a finalising layer on top of a concrete sub-base, screed has many tangible benefits. Though it is similar in appearance to pure concrete, floor screed has a number of immutable properties that enable it to be a more suitable finish to your floor than bare concrete.
Thanks to the smaller aggregates used in the manufacture of screed, it has a thinner, more malleable consistency which leads to a smoother texture and, therefore, a more palatable finish. The composition of screed is also helpful in the installation of underfloor heating systems – particularly in comparison to concrete – as it transfers and insulates heat easily, whilst having the durability to not break down from exposure to heat.
In this article, we will give you 6 floor screeding tips as recommended by the floor screeding experts at AB Drylining.
1. Prepare Your Area
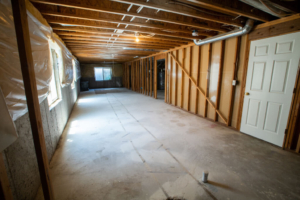
The first of our floor screeding tips is to prepare your area. Using timber pieces, you should create a visualisation of your area which gives you a clear indication of the region of work whilst protecting the other areas of floor. Should there be skirting board in the area you intend to screed, carefully remove these with a hammer and chisel.
In the area you intend to screed, it is vital that you clear any dirt, debris and rogue pieces of rubble present: use a high-quality wire brush to sweep the floor thoroughly and a trowel to remove debris from crevices. If there are any holes or cracks present within the concrete sub-base, it is advisable to fill these in.
It is also important to remove all oil and grease stains from the concrete sub-base, with a scouring brush and detergent, to ensure that the screed bonds correctly with the concrete.
2. Select Your Screed Mix
Possibly the most important step of the floor screeding process is to choose the right type of screed for the project at hand: traditional screed possibly being the best choice for domestic properties and those intended for light commercial use.
Once mixed, it is time to lay the screed.
3. Laying the Screed
Ensure that your screed is well-mixed and mostly free of clumps and excessive bubbles.
Carefully pour the screed mixture over the area of floor you had previously marked up, whilst moving the mixture with a trowel and compacting it with a straightedge or screed-board
Give yourself an ample exit route so as to avoid trapping yourself within a sea of screed.
4. Levelling the Screed
Should the screed you selected not be self-levelling, you should level the floor with a straightedge or straight piece of wood.
5. Allow the Screed to Cure
It is vital that you allow the screed to cure thoroughly: typically, this will take seven days if left under a sealed polyethylene sheet and left undisturbed, in an ambient temperature of above 10 degrees centigrade.
6. Allow the Floor to Dry
Once the floor is cured, there will still need to be time set aside to allow the floor to dry completely. Avoid allowing unnecessary foot traffic, vehicles, heavy goods or installations to be made on the floor until at least three weeks have passed.
The Costs of Screeding a Floor
The ultimate price of screeding your floor will depend on a number of factors. Some of those factors will include:
- Size of floor area
- Number of floors required to have screed applied
- Location of your property
- Type of screed used
- Timeframe required
- Any specialist tools and equipment required
- Customisation options, such as underfloor heating
AB Drylining – Screeding Professionals
Screeding a floor can be tricky and have a whole number of complications which can be challenging to overcome if you are not a trained professional: time and money can be wasted and your renovation project could face undue delay.
It is advisable to contact professionals of screeding services who can assess the environment and what needs to be done whilst delivering an accurate price estimate for the duration of the project.
AB Drylining offers market-leading, expert-driven floor screeding services and also provides the highest quality plastering, drylining and suspended ceiling installation as part of our service catalogue.
FAQ
At what rate will the screed dry?
Screed has an average drying rate of approximately 1mm per day.
How long after applying screed can lay a floor?
You should give screed as long as possible to dry before laying a floor – ideally 28 days/one month – to avoid mould forming.
How long before you can walk on screed?
Wait 7 full days before allowing heavy items or foot traffic onto screed.
What is the minimum thickness of screed?
The thickness of screed should, generally, be between 15mm to 50mm.

